Which Way is Home? How to Read a Map
A map and compass form a reliable pair when you're out on the trails -- so long as you know how to use them. Learn the basics here.
Which Way is Home? How to Read a Map
https://www.contours.co.uk/which-way-is-home-part-2
By Sarah Rowell
A couple of newsletter issues ago, ‘Which Way is Home?’ looked at the importance of all hill walkers being both familiar with and being able to use a compass; a skill which, once mastered, can help get you out of tricky situations just by making sure you are going in the right direction. This is not as easy as it sounds however, as I was reminded once again on Friday when up on the hills above Sedbergh – the path we wanted ran due north, but I ‘felt’ that the one we were on was heading off course and too far east. A quick glance at the compass showed that on this occasion the path was right and my ‘feeling’ was wrong.
How did I know the path was meant to head due north? Because that is what the map showed, which brings us nicely back to where the last article ended, and this one begins: the basics of map reading.
In the UK we are very lucky to have some of the best national maps in the world – something anyone planning a walking holiday abroad should be aware of, as overseas local maps may not give you the clarity and accuracy you are used to via Ordnance Survey (OS) maps, as well as others such as Harvey’s ranges. Even so, at first glance a map can look pretty intimidating – with different colours, lines and symbols everywhere – however it is all totally logical and (as is the case in the UK) an accurate description of what is on the ground, and remembering that is a good place to start.
I am sure I am not alone in having found myself on a hill, sure that I know where I am on a map, and then working hard to try to make what I see on the ground fit with the map. While I have done this more than once and in different circumstances – whether out walking, racing mountain marathons or doing orienteering events – I can never think of an occasion when the forcing has proved correct, so key point one: if it doesn’t quite seem to fit, it probably means you are not where you think you are.
While some of the features on different makes of map are the same, others differ; so either learning or taking the time to check what a feature is on the map legend (all maps will have one listing the main features and symbols) if you are unsure is always worth doing. Some symbols can also look quite alike; perhaps my earliest ‘map moment’ came during my Duke of Edinburgh’s award, when on a planned walk it soon became clear that the nice straight path on the map was in reality a boundary line, resulting in a longer, much more tedious road walk and arriving back late. It was annoying, but at least we did not end up following a boundary line into open countryside which ran over inaccessible cliffs or other dangerous terrain.
As well as differing symbols, OS and Harveys maps use different colours/shades for some types of terrain, so again checking to make sure you know which is which before embarking on a particular route is important. I still occasionally ‘forget’ that deep green on an orienteering map does not mean nice, open, runnable grassland; it means vegetation which is either very difficult to run through or impassable, which is not great when you are trying to get from A to B as quickly as possible.
All maps have two sets of lines on them which, once you know how to use them, can make life so much easier. Firstly all maps, whatever their make or scale (see below) have grid lines on them which run north to south and west to east. Grid lines are set by the British National Grid; they are set 1km apart and in effect divide the map into numerous small squares. Each line has a two figure number (which can be found on the side of the map, as well as on some grid lines). By mentally dividing the square into 10, it is therefore possible to give an accurate six figure number which locates you or a chosen feature to within 100m by reading the numbers from east to west and then north to south. The grid reference will be the same whatever the make or scale of your map, so if you are ever in trouble or need to let someone know exactly where you are on a map, then giving them an accurate grid reference will do the trick. On the map section shown below taken from an OS map of the Yorkshire Dales for example, the dashed lines show a wall which joins up at grid reference 868692: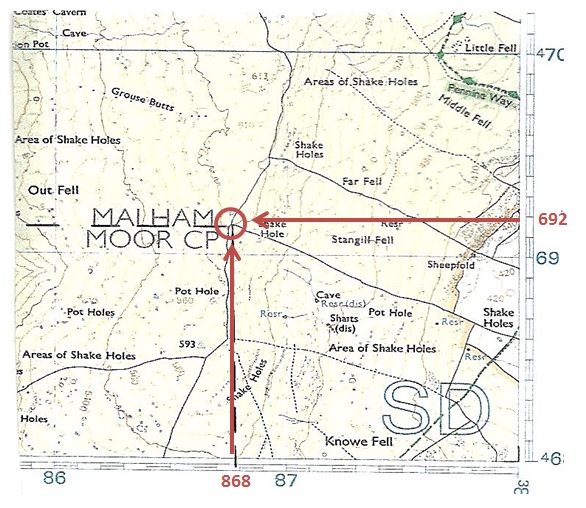
The other key sets of lines on maps are the contour lines – these are the more wavy lines covering the map. Contour lines show the height of the land above sea level, with all points on a contour line being of the same height. Experienced map readers and orienteers can quickly look at the contour lines on a map and create a virtual 3D picture in their head of what the land will look like in terms of how steep the terrain is (the closer the contour lines are together, the steeper it is) as well as the height and the shape of hills and valleys.
Depending on the make of map, the contour lines will either be 50m apart (i.e. each contour line represents a point 50m higher or lower than the line on either side of it) on an OS map, or 75m on a Harveys. Both sets of maps use slightly thicker lines, called index contours, which also have the height printed on them at some points.
Even so, it is not always easy to quickly work out whether the land is going uphill or downhill, and while rivers and lakes tend to be in dips and cairns and summits on the tops of high ground, it is not an uncommon mistake – especially if you are in a hurry – to read the lie of the land the wrong way and setting off expecting to be going up, and finding when you reach a certain point that you are in fact going down.
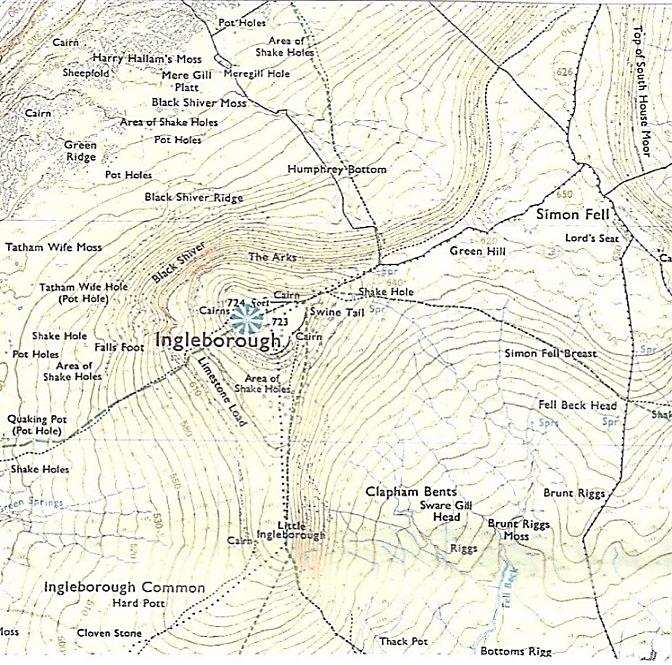
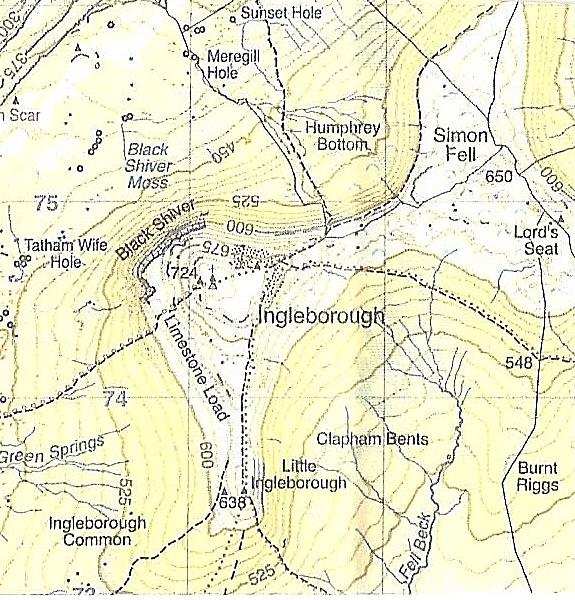
Below are two map sections which show the same area of Ingleborough; the left image was taken from an Ordnance Survey map with a scale of 1:25,000, and the right was taken from a British Mountain Map by Harveys with a scale of 1:40,000. Not only are the scales different, but there are also variations in the colourings and the contour lines, so make sure you understand the map you are using to avoid any confusion:
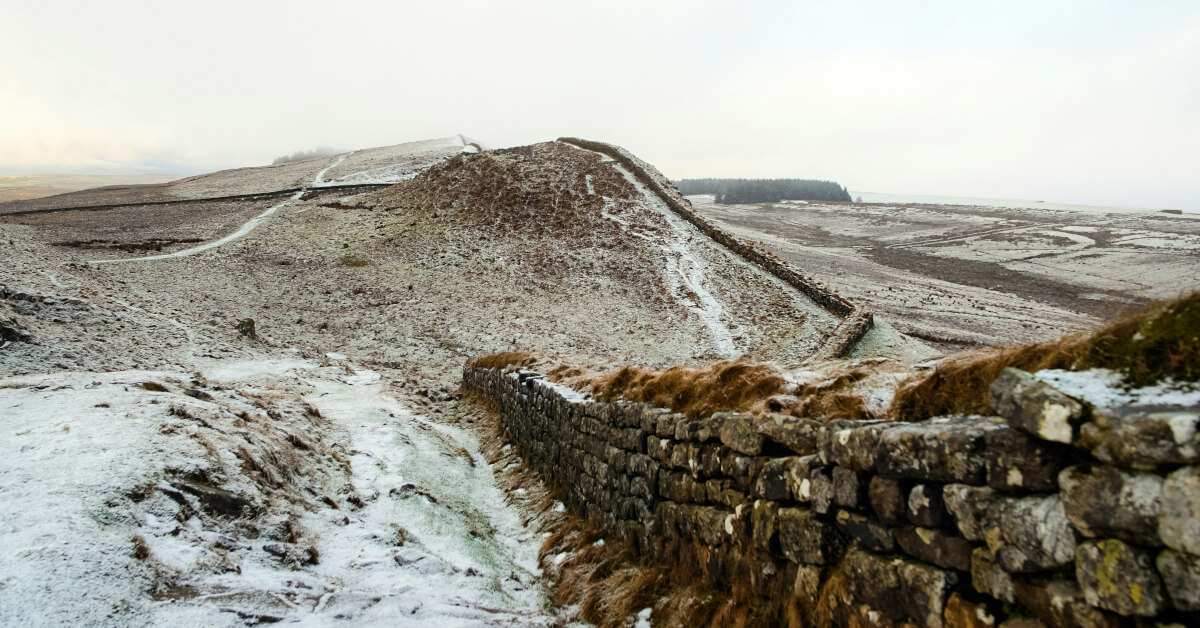
While maps are designed to reflect what is on the ground, things on the ground can of course change – certainly where man-made features are concerned – so if in doubt, make use of natural features which tend not to change. Fences and walls, while great ways to locate yourself and navigate, may not always be on the map and/or may change. Running from High Street in the Lakes to Stoney Cove Pike one year, my partner and I contoured around Thornthwaite Crag in thick mist, and on coming across a wall we started following it downwards, knowing that there was only one wall on the map and that it would take us to our destination, except after a while a quick compass check showed we were heading in the wrong direction. We were faced with the dilemma of map and compass apparently disagreeing with each other. After a little too much faffing and puzzling, a double check on a different make of map showed the presence of a second wall, running in the wrong direction for us, but aligned to our compass bearing; it was a lesson well learnt, even if it was not a happy one at the time!
And lessons are always being learnt; however experienced you are with a map and compass, it is a very rare person who does not still make mistakes at times – the key is being able to work out that you have made one and then rectify it, which can be more satisfying in the long run!