How to Take Great Landscape Photos with your Phone
Contours Walking Holidays
How to Take Great Landscape Photos with your Phone
https://www.contours.co.uk/how-to-take-great-landscape-photos-with-your-phone
With the advancement of technology over the last few years, many people are now using their smartphones as a replacement to cameras to produce high quality photos whilst on their walking holiday, myself included. Carrying a smartphone that fits easily in your pocket or rucksack hip belt whilst walking, so that it is always to hand, is so much more convenient than lugging a bulkier camera and case around.
.jpg) Most smartphones have a quick launch option for its camera, usually by pressing the home key twice in quick succession. Some phones may also have an app shortcut option whereby you can set a couple of apps to open from your lock screen with one swipe, thus avoiding the need to enter your passcode or perform fingerprint recognition. I always have my camera app and my ViewRanger mapping app set to swipe from my lock screen to allow for fast access to both whilst walking. With your smartphone always handy in a nearby pocket, and with its quick launch facility, you will always be ready to take advantage of an opportune photo moment whilst out on your walk.
Most smartphones have a quick launch option for its camera, usually by pressing the home key twice in quick succession. Some phones may also have an app shortcut option whereby you can set a couple of apps to open from your lock screen with one swipe, thus avoiding the need to enter your passcode or perform fingerprint recognition. I always have my camera app and my ViewRanger mapping app set to swipe from my lock screen to allow for fast access to both whilst walking. With your smartphone always handy in a nearby pocket, and with its quick launch facility, you will always be ready to take advantage of an opportune photo moment whilst out on your walk.
Taking a good quality photo on your smartphone is not just a case of pointing and pressing a button, however. Your smartphone is clever, but not clever enough to tell you if the composition and perspective of your photo, or focus of your subject, are good enough to create a great photo; this still requires the skill of the photographer. I’m no photography expert, but I have done a few photography courses in the past and people always tell me I take good photos, so here are my tips for taking great photos on your smartphones.
Every time I take my phone out of my pocket or rucksack hip belt to take a photo, I wipe the lens to remove any dust or fingerprints, ideally using a soft lens cloth. You don’t want smudge marks or dust spots on your photos!
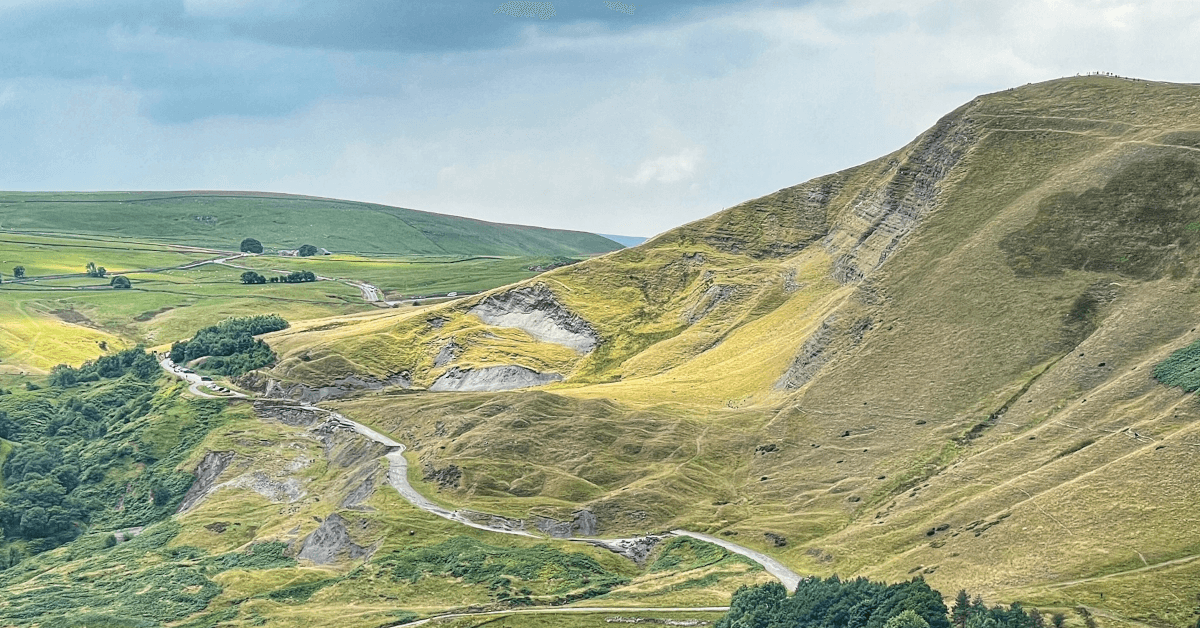
A sunny, clear blue sky does not always guarantee a good photo. It can often be too bright or hazy, which affects the intensity of the colours in your photo and the amount of detail captured. I grew up being told to have the sun behind you when taking a photo, however this will more often than not produce a flat picture with little depth. Side lighting usually produces the best images, as this brings out highlights and shadows and gives a better sense of dimension to your photo. Cloudy skies produce more interesting photos than clear blue skies, and stormy skies with shafts of light penetrating through can produce very dramatic photos. The best light for photos is usually during early morning or early evening, however there is no ideal way of predicting when the light will be right; you just have to wait and see what happens.
.jpg) The first image of the two barns with a clear blue sky is very flat and doesn’t have as much depth as the other photos. The highlights and shadows in the other five cloudy photos provide much more interest and a better sense of dimension.
The first image of the two barns with a clear blue sky is very flat and doesn’t have as much depth as the other photos. The highlights and shadows in the other five cloudy photos provide much more interest and a better sense of dimension.
Composition refers to how you intentionally arrange the elements or subjects that make up your photo. The rule of thirds means imagining that your photo is divided up with two horizontal lines and two vertical lines, with four intersections where the lines meet. The important elements of your photo should be placed on these lines or on the four intersection points to make your photo more balanced and dramatic.
If you're taking a landscape photo, the horizon should lie on either the top or bottom horizontal line.
 In the camera settings on your smartphone, you should have the option to switch grid lines on. These will appear on your screen to help you position your subject(s) correctly using the Rule of Thirds principles. The lines do not appear on your actual photo.
.jpg) The cow, cairn and signpost in the above photos fall on the left and right intersections respectively, and in the third image the landscape takes up a third of the image, and the sky the remaining two thirds, giving more balanced and dramatic photos.
The cow, cairn and signpost in the above photos fall on the left and right intersections respectively, and in the third image the landscape takes up a third of the image, and the sky the remaining two thirds, giving more balanced and dramatic photos.
Watch out for distracting backgrounds when composing your photos, as these can take the attention away from your intended subject. Also check to make sure that you don’t have unwanted telegraph poles/cables, fence wires, or random people etc. creeping into your photos; move your position to avoid these.
Once you have the composition right, you then need to make sure that the subject of your photo will be in sharp focus. Smartphones are very good at autofocusing, but they may not pick out the intended subject of your photo. To set the focus where you want it, simply tap the screen on your subject. A circle or square normally appears depending on your make of phone.
You can also adjust the exposure of your photo, i.e. how bright or dark your image is. Once you tap the screen to focus your subject, your smartphone will also automatically adjust the exposure. If you focus on a subject that is in a dark area of your photo, your phone will end up over exposing your image - making the rest of the photo too bright - or if you focus on a bright area your photo will end up under exposed and too dark. When you tap to focus, a sliding scale will also appear - usually with a sun or lightbulb symbol - which allows you to manually adjust the exposure.
A lot of people always take photos from a standing height. By taking a photo from a higher or lower angle, you can create a unique view of your image that you wouldn’t ordinarily see from standing height. I often kneel to take photos at ground level or try and stand on top of something to get more height.

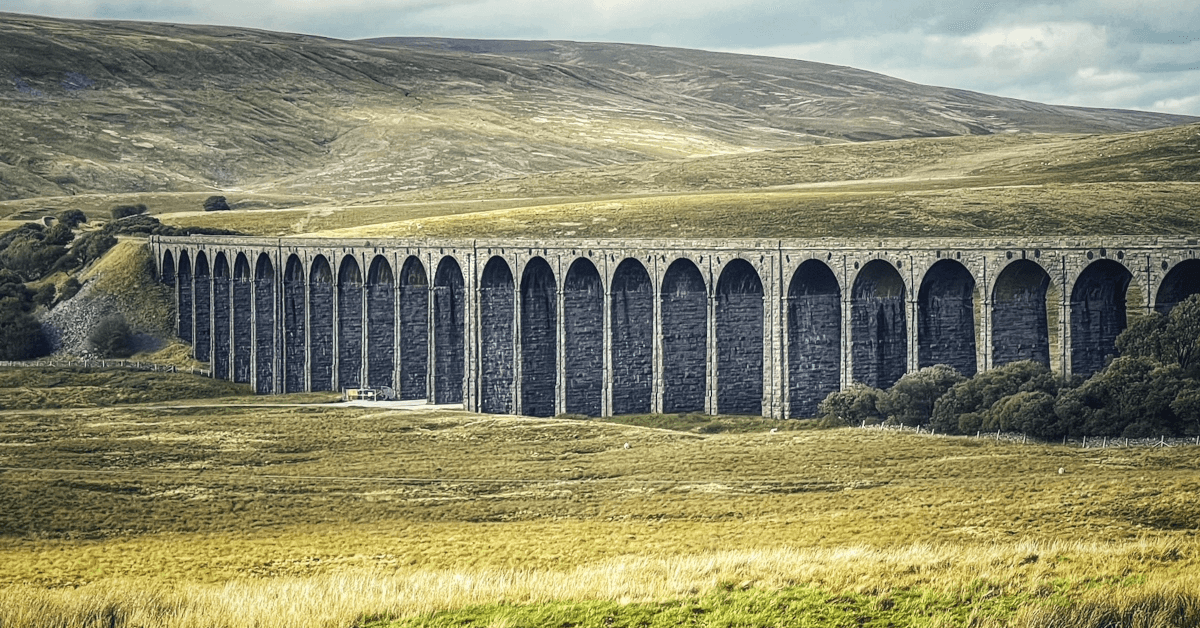
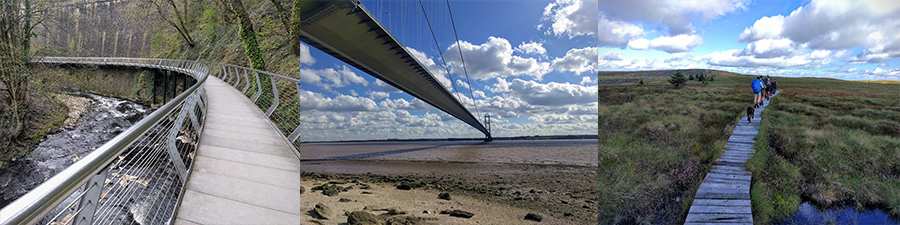
Another useful compositional tip is to use leading lines; a line that draws the viewer's eye to a particular part of the frame. Leading lines help lead the viewer's eye deeper into the photo, creating a sense of depth; think following a footpath, river, train track or row of houses etc.
 Be careful when using the zoom on your smartphone, as this can reduce the image quality and make your photo grainy and pixelated. The smartphone zoom works by pinching and stretching the image with two fingers on your screen. This basically just crops and enlarges your image. It’s better to get nearer to something than to zoom in from a distance, as you’ll end up with a much better quality of photo.
Always hold your phone with two hands to keep it steady and prevent blurry images. Resting your phone on something e.g. a wall, is also a great way to help keep it steady. You can buy specially designed mini tripods that fit all phones, such as the JOBY GripTight GorillaPod. Having a mini tripod will also allow you to use your phone's timer setting to take photos hands free and thus avoid any camera shake. This method is also useful as it allows you to get in the photo too!
Take multiple photos of the same thing, then you can keep the best image and delete the rest. Try experimenting using different perspectives and compositions, and from various distances, to get the most dramatic shot.
Use your smartphones Panorama setting to create beautiful, elongated landscape images. This usually requires moving your phone from left to right to capture an image. A slow but steady hand movement is very important in panorama mode.

There are many photo editing options or apps that you can use on your smartphone. The autocorrect option is good for correcting exposure errors and brightness etc., but it's not always the best choice. Sometimes your original photo will be the best. Photo editing apps will not turn a bad photo into a good photo; you need to just practice taking good photos and then use the apps to enhance your image. Don’t overedit though.
I hope these tips have been useful; writing this blog has certainly been a good refresher course for me. Taking great photos on your smartphone requires photography skills, and you won’t get the perfect image every time - I certainly don’t - but with practice and experimentalism, quality photo images can be achieved.