Lacing Tricks for Hiking Boots
Discover a range of lacing tricks for hiking boots to relieve friction points and other issues.
Lacing Tricks for Hiking Boots
https://www.contours.co.uk/lacing-tricks-for-hiking-boots
by Cass J
We put a lot of emphasis on buying shoes that fit well and breaking them in correctly, but even the holy grail of walking boots won’t keep you blister-free if they aren’t tied up right.
If you’ve only tested your boots on short walks with multiple rest days between them, you might not notice much friction, but even the tiniest sneakiest rub can become a real issue when you’re two days and thirty miles into a particularly bracing National Trail.
It’s well-worth stocking up on some boot-lacing tricks to pre-empt problems and adapt your fitment as you go.
Jump to a lacing technique
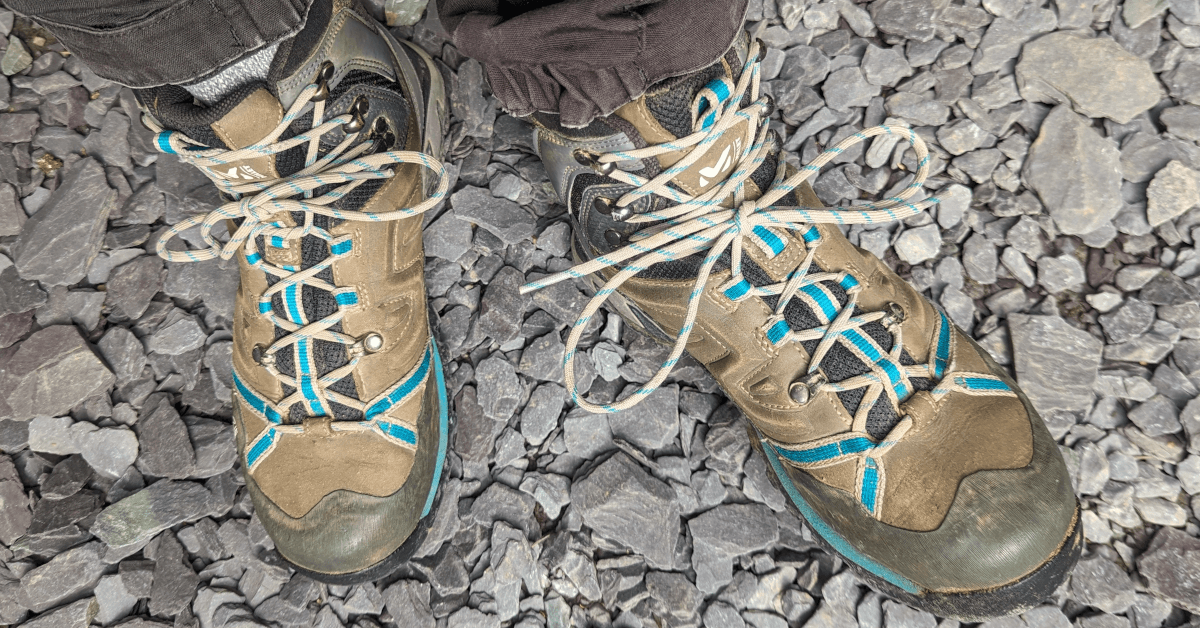
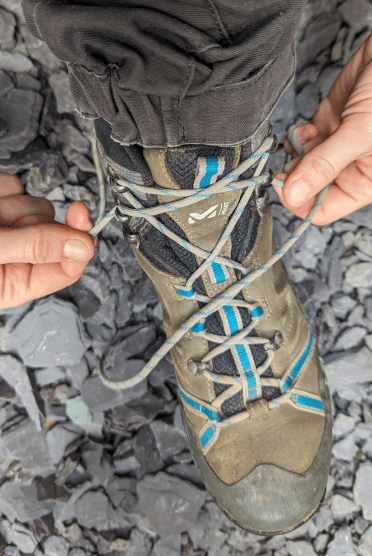
Of course everyone reading this will know the standard criss-cross lacing pattern. We’ve all used it for years and it’s a reliable starting point. There are, however, a few fine-tuning points that seem worth mentioning.

Every time you lace your boots, make sure to press your heel as far back in your boot as you can. Put your foot in your boot and tap the heel against a solid object like a step to make sure you’re pushed fully back into the cushioning.
This is where we want to secure our feet, held firmly within the boot with plenty of room around the toes, with any of the lacing techniques we’re about to explore.
To tension your laces correctly, start down toward the toe-end of your boot and work steadily up through the eyelets. You shouldn’t be able to get your finger under your laces, but don’t tighten them beyond that — you don’t want them digging into your foot and cutting off circulation!
The loops of a good bow will sit straight across your boot, neatly balanced. If you find yours tend to twist or point along your foot, your bow is significantly more likely to come undone as you walk.
The difference is in the direction you tie the starting knot and the direction you tie the bow itself. You want to tie these in opposite directions: if the right lace goes over the left as you tie your starting knot, aim to tie the left loop over the right as you complete the bow. If you’re still scratching your head, check out this illustrated guide to tying a well-balanced bow.
Once your boots are tied, it’s worth a test walk to see if you can identify any issues. Some, like a lack of space for your toes or the afforementioned circulation issues, will make themselves known very quickly, possibly before you get out the door.
Others, like lifting heels, may prove more subtle on short walks. They require careful attention to spot before they cause damage on a long-distance hike.
Important foot facts
We all have slightly mismatched feet. What works for lefty might not suit righty. Make sure to adapt your methods accordingly.
Our feet swell as the day wears on, so a good fit in the morning may become restrictive by the afternoon. Make time to re-lace your boots during day-long walks.
Test walk revealed no issues? In that case, walk on! (But perhaps keep this guide in your pocket on your long-distance walking holiday. Just in case.)
Most of us have probably identified a few potential problems, so it’s time to fix them with some ingenious lacing techniques.
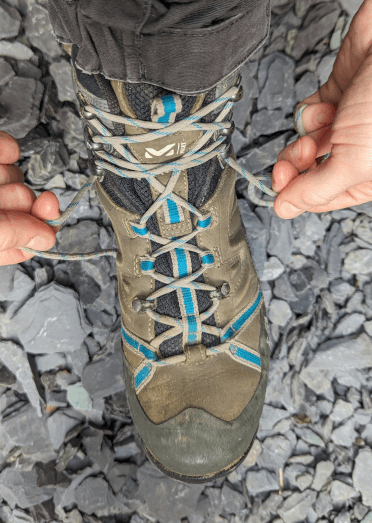
Your laces must hold your boot firmly on your foot, but it’s equally important that the tightness you need around your heel and ankle can’t gradually shift down through the laces to constrict your toes.
To prevent this, lock off your looser toe section with a double starting knot, also sometimes known as a surgeon’s knot.
This knot is remarkably uncomplicated. First, unlace your boots down to the point where you want the tension to change. Wedge your heel firmly into the back of your boot, and then adjust the tension in the lacing over your toes until they’re comfortable and have plenty of room to move.
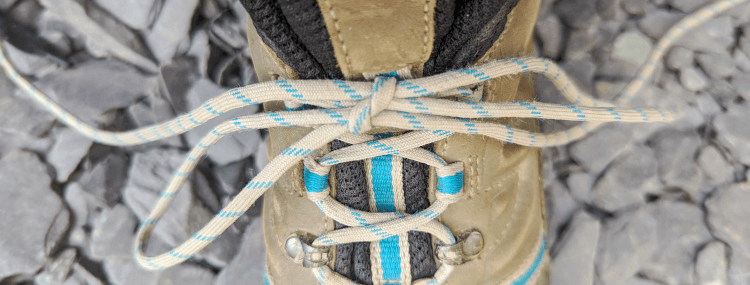
Now, rather than continuing to thread the laces through your boot’s eyelets, knot them here as you normally would before tying a bow, but wrap the laces around one another one more time, like so:
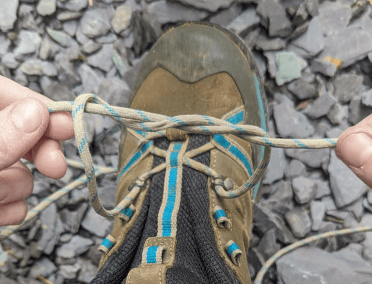
And that’s it. You can continue lacing as normal. The extra wrap-around provides all the friction you need to protect your nice looser lacing from the tension you’ll need further up your boot.
Wriggle room: other factors
Providing your toes with space to move is as much a consideration when you’re choosing your socks as tying your laces. Choosing thick socks or wearing two pairs can help reduce friction against your heel, but if the extra material puts pressure on your toes, it’s not the right technique for you and your current boots.
Now that you’re aware of the double starting knot, you may be tempted to deploy it beneath the final bow at the top of your boot. This isn’t as good an idea as it first appears: the double starting knot is wider than the normal starting knot. That extra width isn’t easy to compress, and it makes your bow more likely to unravel as you walk.
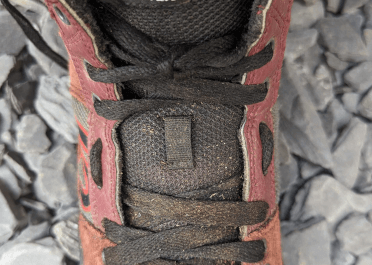
If your laces apply too much pressure to the top of your foot, try gap lacing around the pressure point. Rather than crossing your laces across the boot from eyelet to eyelet, this method threads the laces along the foot and resumes cross-lacing higher up.
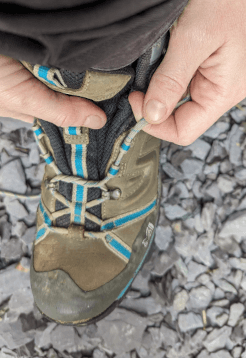
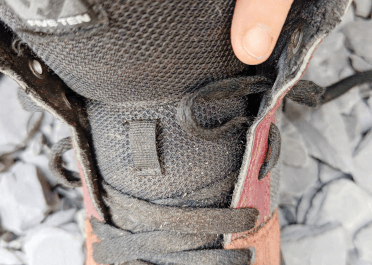
To use this method, unlace your boot all the way down to the eyelet immediately below the pressure point.
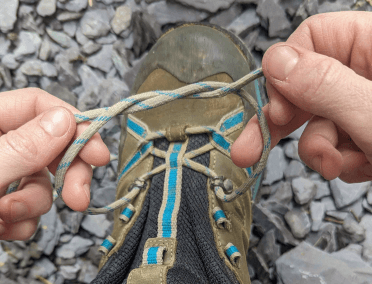
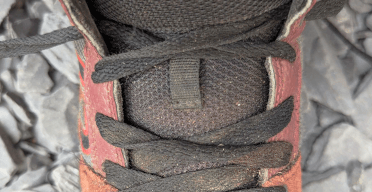
As you go to relace the boot, rather than crossing the laces over your foot to the opposite eyelet, thread your laces vertically upwards to the eyelet on the far side of the pressure point, keeping the left lace on the left and the right lace on the right.
If the pressure point is large, you can continue to lace vertically through additional eyelets.
Once you’ve built a nice open space over the painful area, resume normal crossover lacing.
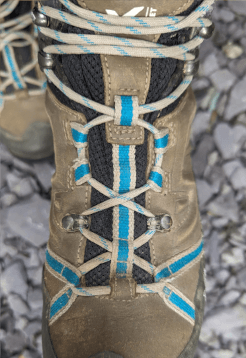
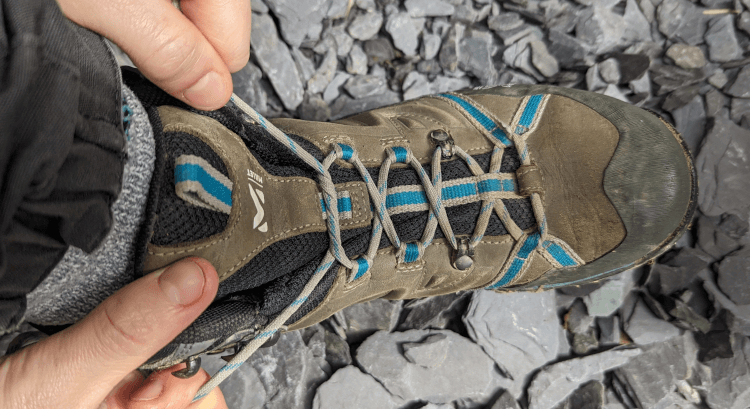
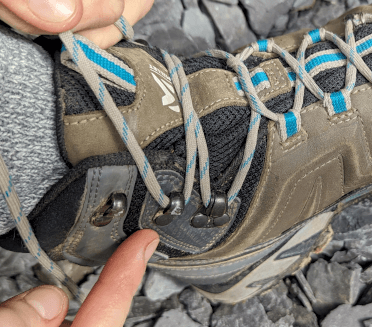
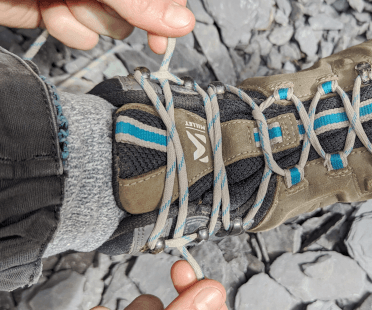
You’ll notice my walking boots have the now-popular externally mounted metal eyelets rather than traditional eyelets through the boot upper.
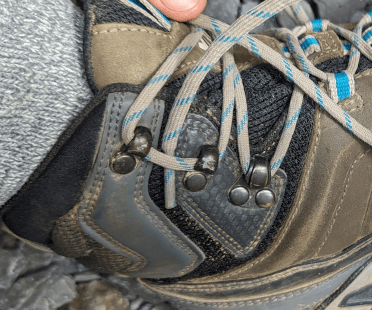
If your boot has true eyelets, your vertical lacing can be done externally, which is easier to do, or internally for a tighter fit, both demonstrated here on my somewhat battered mountain biking shoes.
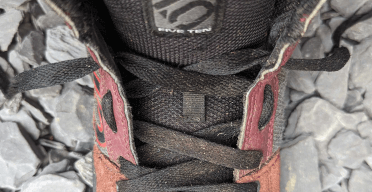
If your desired gap spans multiple traditional eyelets, be sure to thread the lace over and under vertically through the eyelets to maintain stability.
Gap lacing keeps the crossed-over laces from pressing down into the top of your foot and allows the boot to spread wider within the window it creates, relieving pressure. It’s a useful measure if you have a high or delicate instep, but keep in mind that there are trade-offs in stability and that the remaining crossover laces will need to do more work to keep your boot secure, so you may create pressure points elsewhere.
Be sure to test this method well in advance of a long-distance walking tour to make sure it suits your feet.
Boot cleanliness
Some friction spots are temporary, manufactured by grit, debris and damp. Lacing can help remediate these issues, but ideally, you need to keep your boots clean and dry internally.
The latter can be easier said than done on a multi-day walk in wet weather or over boggy terrain, but every little helps, so make use of drying rooms and rolled-up paper to help dry your boots overnight.
Buying a boot with external waterproofing can be a good move, too, until you step into a deep puddle and the water’s on the inside...
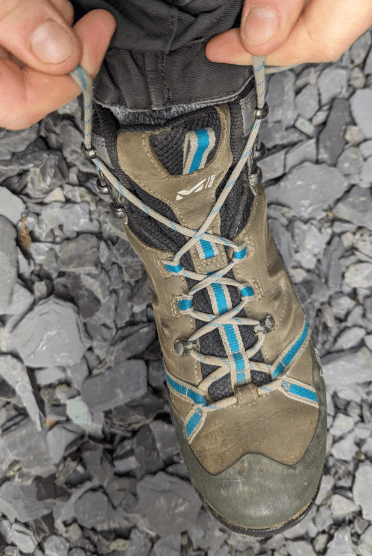
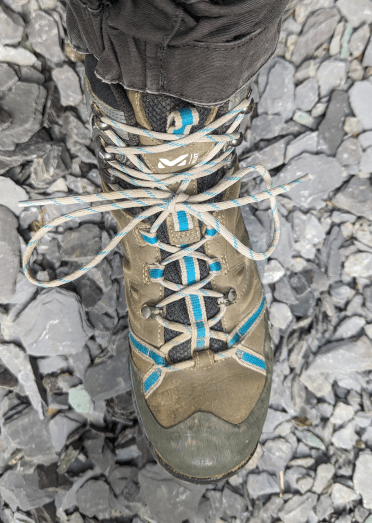
The most common cause of blisters has to be heel slip, which is when your heel lifts or shifts forwards within your boot as you walk. It happens when you have too much space in the top of your boot, so we need to draw that material in more firmly to fix the issue.
First, get the lacing over your toes and instep right. Beneath your lace hooks, lock off with a double starting knot as described above.
Exactly how to proceed with your lace hooks depends a bit on how many you have and where you need to cinch in your boot, so you can adapt these basic instructions accordingly.
Thread your laces in a crossover pattern through the lowest hooks.
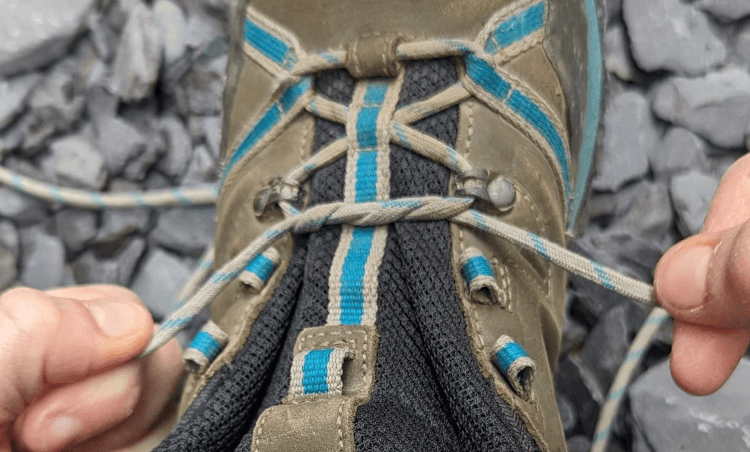
When you reach the penultimate pair of hooks, thread your laces through as normal, but rather than criss-crossing to the top pair of hooks, run your laces up through them vertically.

Now, cross your laces and thread them through the opposite vertical lace.
Pull the laces back to the middle and tie them off as normal.
.png)
.png)
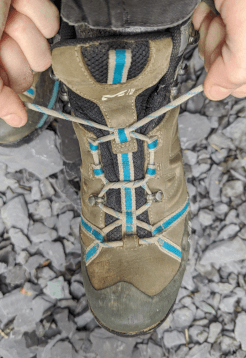
And there you go, your heel should be much more secure within your boot.
Nefarious hills
Even a boot that’s seemed well-tied for most of your walk may slip when you tackle a steep ascent or descent. Make sure to stop and re-lace your boots if this starts to happen; the temptation on a climb might be to keep walking to maintain your momentum, but the cost will be steeper than the hill if your heels start to blister.
Hooks are a great invention, allowing you to fully unlace the top half of your boot to get them off and on again without, you know, having to fully unlace six eyelets.
They grip the lace more tightly than eyelets, too, essentially locking off tension — until they don’t, and suddenly your beautifully tensioned bow is flopping in the air, ready to catch in the hooks of the opposite boot and launch you over the side of Offa’s Dyke.
Not everyone will experience this issue, but anyone who has will want to fix it immediately. It’s a long way down from Offa’s Dyke.
There are two fixes you can try to keep your laces on their hooks, and both are thankfully very simple.
For this method, the overall path of your laces will run as normal, with one critical change: as you go to thread your lace through each hook, you’ll feed it through over the top of the hook and out underneath.
.png)
This essentially ties the lace to the hook at every level.
For this method, you’re going to lace the hooked section of your boot in reverse, starting from top to bottom. While this is mildly more complicated than the twist-tie method, it has the added benefit of lessening any friction between your finishing bow and your leg.
From the last pair of eyelets, cross your laces over your foot and run them through the top pair of hooks.
Now cross the laces down to the next pair of hooks.
Lace your way down your boot, criss-crossing between hooks, and after the last pair of hooks, secure your laces with a bow.
This allows you to compress the top of your boot nicely, vastly reducing the chance that your bow pops off.
Both of these methods are completely compatible with the heel-locking lacing described above, you’ll just need to invert it if you’re lacing your hooks from top to bottom.
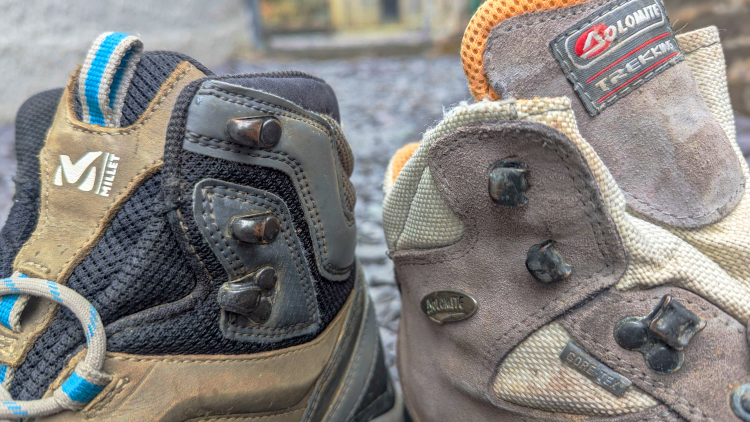
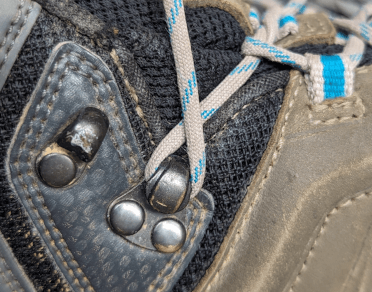
Check your hooks
Some boots are made with much more flexible hooks than others. These softer metal hooks occasionally open wider than they’re intended to, making them far more likely to snag on the laces of the opposite boot. They’re worthy of a quick check each morning as you head out on your hike: apply pressure to close any overly open hooks you find.
Hopefully these lacing techniques come in handy and help you get the absolute most out of your walking holiday. For a complete look at buying the right boots and socks and generally looking after your feet on the trail, have a read of our post on blister prevention.
Oh, and if you’re reading this too late, there’s always How to Treat Blisters.
Anyway, the most important advice anyone can give is to pay attention to your feet and choose not to power through discomfort.
Most friction issues can be fixed on the trail with a bit of care, attention and boot-lacing wizardry. Don’t let blisters win!

Marketing and Strategy Consultant
Writer, editor and Google-wrangler at Contours Holidays, Cass spends each weekend on the trails, walking the dog or plummeting downhill along Wales’ best mountain biking tracks.